How to Create and Deploy a Simple ERC-20 Standard Token on Cronos Testnet: The Step-by-Step Guide.

I am a technical writer obsessed with breaking down complex concepts into easy-to-understand bits.
Prerequisites
It is advisable you know the basics of the following to grasp the tutorial better:
What a blockchain is and how it works.
Basics of solidity programming language.
An understanding of Hardhat.
Introduction
Blockchain is a revolutionary technology, and there is currently an increased interest in it. However, there have been different issues for both beginners and established developers, who find it hard to see specific resources on certain chains.
Although people in the industry have recognized this problem, there is still a shortage of learning materials. One of the chains with this problem is the Cronos blockchain, and although there is information on the official documentation implementing it might be difficult for starters. This tutorial aims to show the beginner and established developer how to create and deploy a simple standard ERC-20 (Ethereum Request for Comments 20) token on the Cronos blockchain.
The Cronos Blockchain
The Cronos blockchain is relatively new and was launched in November 2021. Since then, it has gained attention from the press and attracted a couple of developers interested in the ecosystem. It is the first to collaborate between Ethereum and the Cosmos ecosystem; this interoperability supports Metaverse, Defi, and NFTs.
The selling point is mainly the ease and speed at which developers can easily translate apps from other blockchains without worrying about scalability issues faced by other well-known blockchains.
Why not Mainnet?
Code deployed to a blockchain is unchangeable. There have been situations where developers have made mistakes in their code and smart contract, which has cost people millions of dollars. The Akutars NFT smart contract event, which happened earlier this year, is one of such.
The testnet environment is designed to help developers test the functions of their contract before they deploy their code to the mainnet. In the testnet environment, you can play around and make sure your smart contract functions work as intended, and if there are any mistakes, the developer can quickly correct them.
The cost of deploying a code to the testnet is practically zero. In addition, you can also calculate and know how much it will cost if it were to be deployed to a mainnet environment, including the costs of your smart contract functions. So, this and more reasons are why we are deploying to the testnet in this guide or tutorial.
Getting Your Standard ERC-20 Token Ready and Deploying to Testnet
Since we will be deploying a standard ERC-20 token, you should have written out the needed functions to execute the objectives you want.
To create a simple ERC-20 token, follow these steps:
Step 1: Creating your Smart Contract
Head over to openzeppelin and use the interface shown to you below:
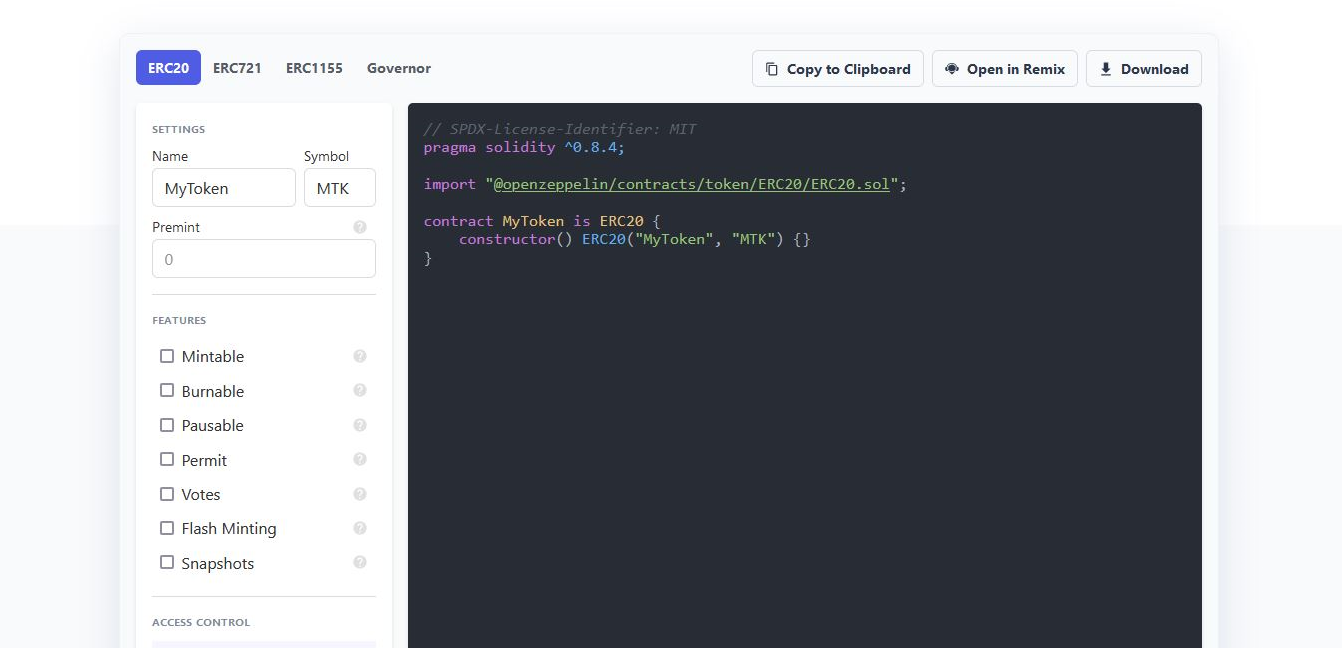
Under the Name, Symbol, and Premint, you should input the name of your token, the symbol, and the total amount you want it to have, and for the features, you should select which you want it to have.
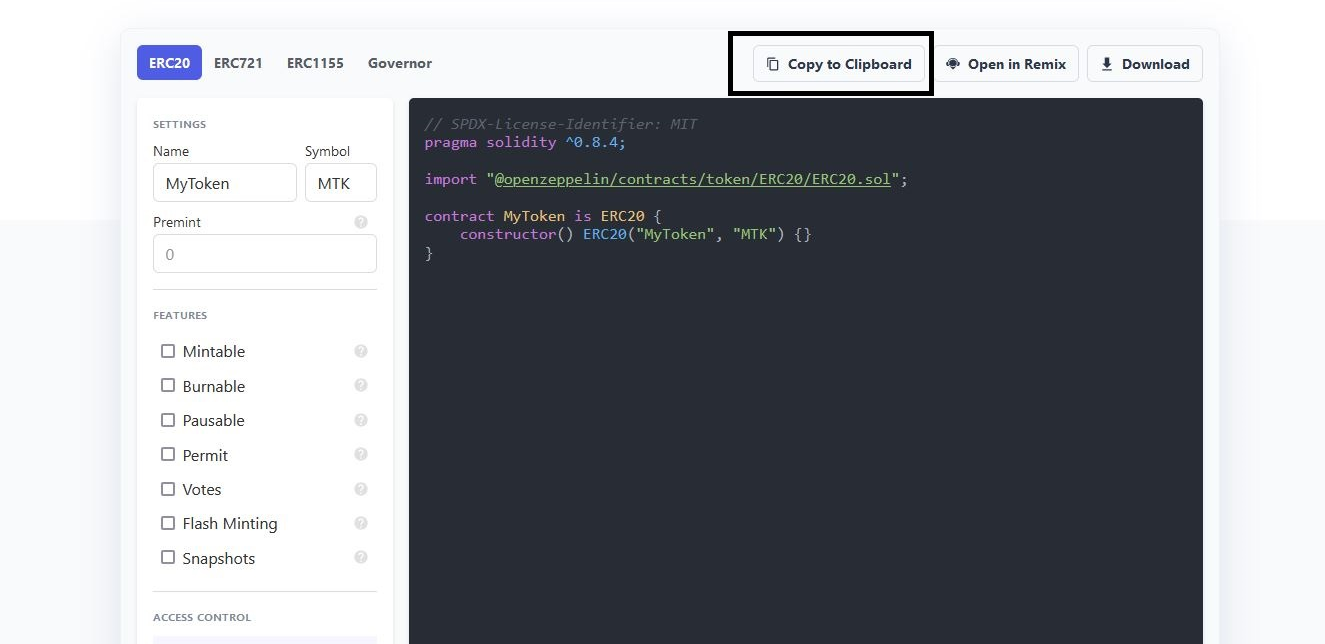
When you have done this, you should copy your smart contract code as shown:
Step 2: Creating your Hardhat Environment
Create a new folder on your desktop and open it using a text editor; for this guide, we use visual studio code if you don't have it download it here.
Before we proceed, you have to set up your hardhat environment to allow you to code and deploy. To do this, follow these instructions:
Open your Windows PowerShell or Command Prompt
Concatenate into the new folder you created,
cd Desktop/(name of the folder you created).Then run the command
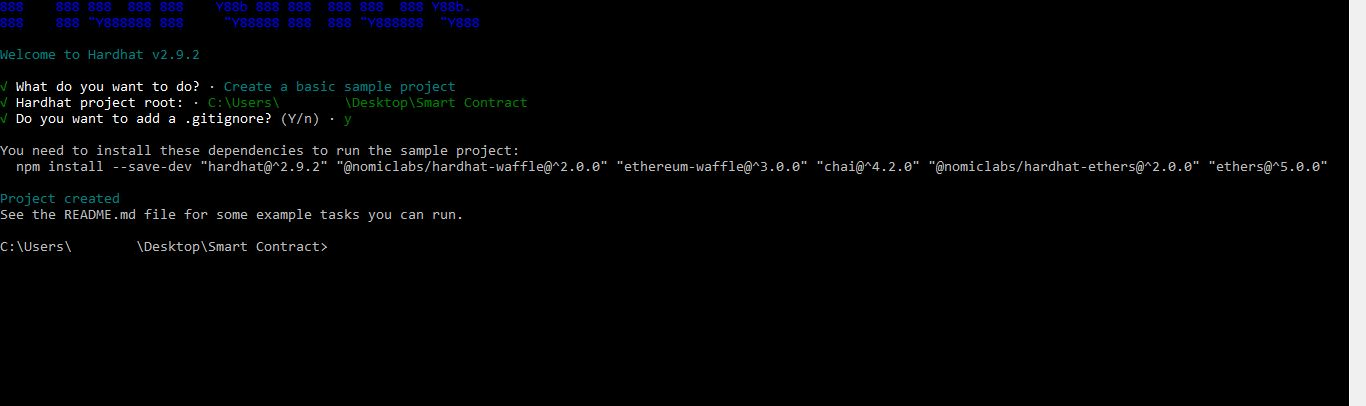
npx hardhat.Some options will come up; you should choose the first option, which is to create a simple project. The reason for this decision is that we are not building anything complex.
If you followed this correctly, you should get this:

Press enter until you get a pop-up telling you the project has been created:
Step 3: Configuring your Smart Contract Using Hardhat
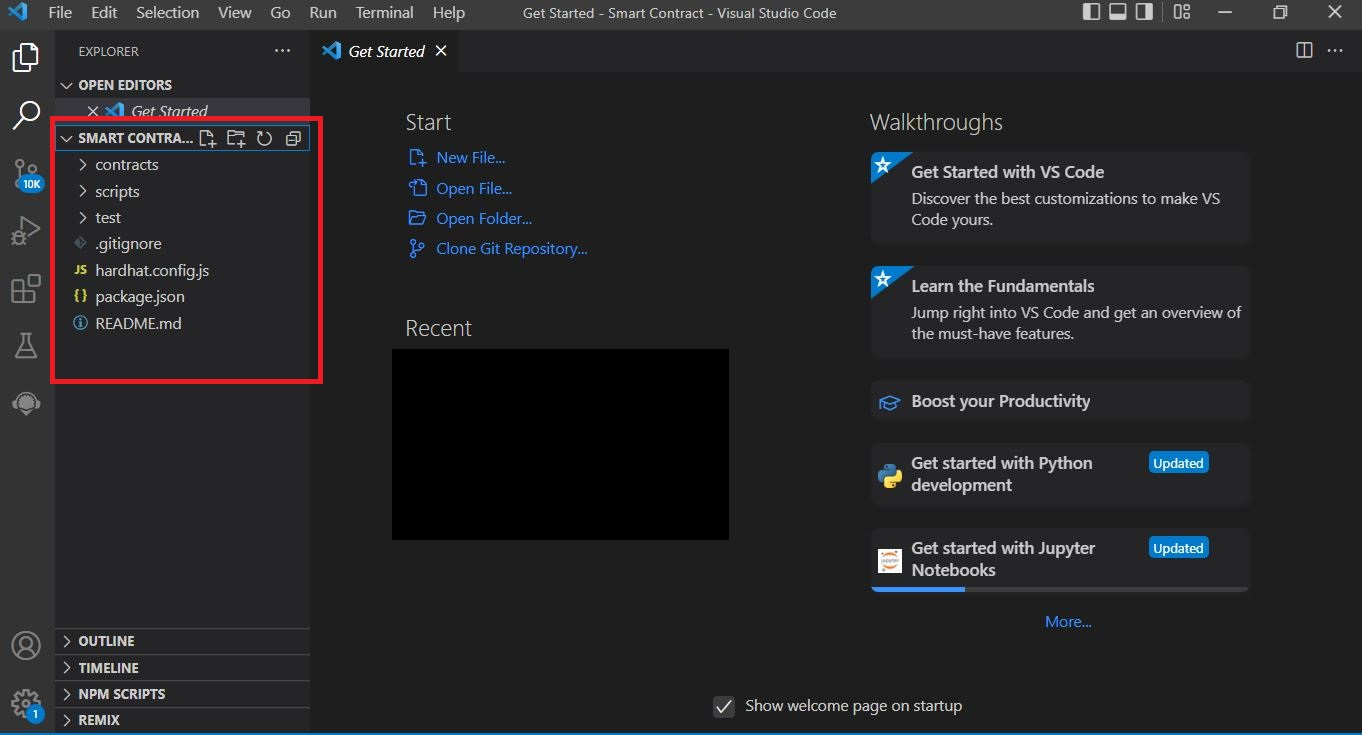
Now that we have successfully created our hardhat environment to deploy let's open the folder we set in our visual code.
If your previous step was successful, when you open the folder, you will find these files in it already:
Under the contract folder, create a new file for your smart contract and end it with .sol. After this has been done, paste your code of Step 1 from your clipboard into the file.
Next, create a deploy_contract.js file in the scripts folder and paste this code:
const hre = require("hardhat");
async function main() {
  const (Name of token file) = await hre.ethers.getContractFactory("(Name of token file) ");
    const (name of token file) = await (Name of token file).deploy();
    await (name of token file).deployed();

    console.log("(Name of token file) deployed to:", (name of token file).address);
}
main()
  .then(() => process.exit(0))
  .catch((error) => {
    console.error(error);
    process.exit(1);
  });
It is important to note these particular lines of code:
{
  const (Name of token file) = await hre.ethers.getContractFactory("(Name of token file) ");
    const (name of token file) = await (Name of token file).deploy();
    await (name of token file).deployed();

    console.log("(Name of token file) deployed to:", (name of token file).address);
}
let's assume the name of your smart contract .sol file is "CronosToken" You have to substitute it this way for it to work:
{
  const CronosToken = await hre.ethers.getContractFactory("CronosToken ");
    const cronosToken = await (CronosToken).deploy();
    await cronosToken.deployed();

    console.log("CronosToken deployed to:", cronosToken.address);
}
It would be best if you took note of the capitalizations used since its case sensitive.
Next, copy and paste this code into your package.json file:
{
  "name": "hardhat-project",
  "devDependencies": {
    "@nomiclabs/hardhat-ethers": "^2.0.2",
    "@nomiclabs/hardhat-waffle": "^2.0.1",
    "chai": "^4.3.4",
    "ethereum-waffle": "^3.4.0",
    "ethers": "^5.4.1",
    "hardhat": "^2.4.3"
  },
  "dependencies": {
    "@openzeppelin/contracts": "^4.2.0",
    "dotenv": "^10.0.0",
    "solc": "^0.8.13"
  },
  "scripts": {
    "dev": "npx hardhat run scripts/deployContract.js --network development",
    "testnet": "npx hardhat run scripts/deployContract.js --network testnet"
  }
}
In the code above, we specified we want it to be deployed to testnet using this line:
"testnet": "npx hardhat run scripts/deployContract.js --network testnet"
Now that you have done this, let's configure the hardhat.config.js file with the following code:
require("dotenv").config();
require("@nomiclabs/hardhat-waffle");

// This is a sample Hardhat task. To learn how to create your own go to
// https://hardhat.org/guides/create-task.html
task("accounts", "Prints the list of accounts", async (taskArgs, hre) => {
  const accounts = await hre.ethers.getSigners();

  for (const account of accounts) {
    console.log(account.address);
  }
});

const getHDWallet = () => {
  const { MNEMONIC, PRIVATE_KEY } = process.env;
  if (MNEMONIC && MNEMONIC !== "") {
    return {
      mnemonic: MNEMONIC,
    };
  }
  if (PRIVATE_KEY && PRIVATE_KEY !== "") {
    return [PRIVATE_KEY];
  }
  throw Error("Private Key Not Set! Please set up .env");
};

/**
 * @type import('hardhat/config').HardhatUserConfig
 */

module.exports = {
  solidity: "0.8.4",
  networks: {
    development: {
      url: "http://localhost:8545",
      accounts: getHDWallet(),
    },
    testnet: {
      url: "https://cronos-testnet-3.crypto.org:8545",
      accounts: getHDWallet(),
    },
  },
};
After doing this, create a .env file in the main folder or root directory. Get the private keys of the wallet you want to deploy with and do this:
PRIVATE_KEY = Private keys that you copied
It should look this way:

Step 4: Deploying your Smart Contract
Before we deploy, we must get testnet tokens, head over here, and get some.
After you have, open your terminal in visual code and run the command npx hardhat compile to compile your smart contract.
Next, you should run the command npm run testnet .
If you followed through the steps correctly, you should get this feedback below with the address your contract address:

Conclusion
Finally, you have deployed your smart contract to Cronos testnet. Now that you know how it is done, you can play around with it and test out your theories before you spend real money and deploy it to the mainnet, which is immutable.

